
Classes are the best way to organize access to activities for different groups of users in Flint. By creating a class for each class you teach, club you lead, etc., you can create a space to put activities you'd like to share with a designated subset of people in your school.
Classes can be automatically created to align with rosters through an LMS/SIS import, but sometimes you might want to create additional classes. This guide will show you how.
Create the class
- In the sidebar, under Classes, click Add a class.
- Choose Create in school.
- On General, enter the class Name. You can also upload a Logo and pick a Color.
- Switch to Moderation and access in the list on the left if you want to set Access permissions, Status, and which moderation categories send email notifications. You can change all of them later.
- Click Create. Flint opens the class on its People page and adds it under Classes in the sidebar.
New classes start Published. If you choose Unpublished, only people who can edit can see the class, regardless of its access permissions. Publish it before students use the link or join.
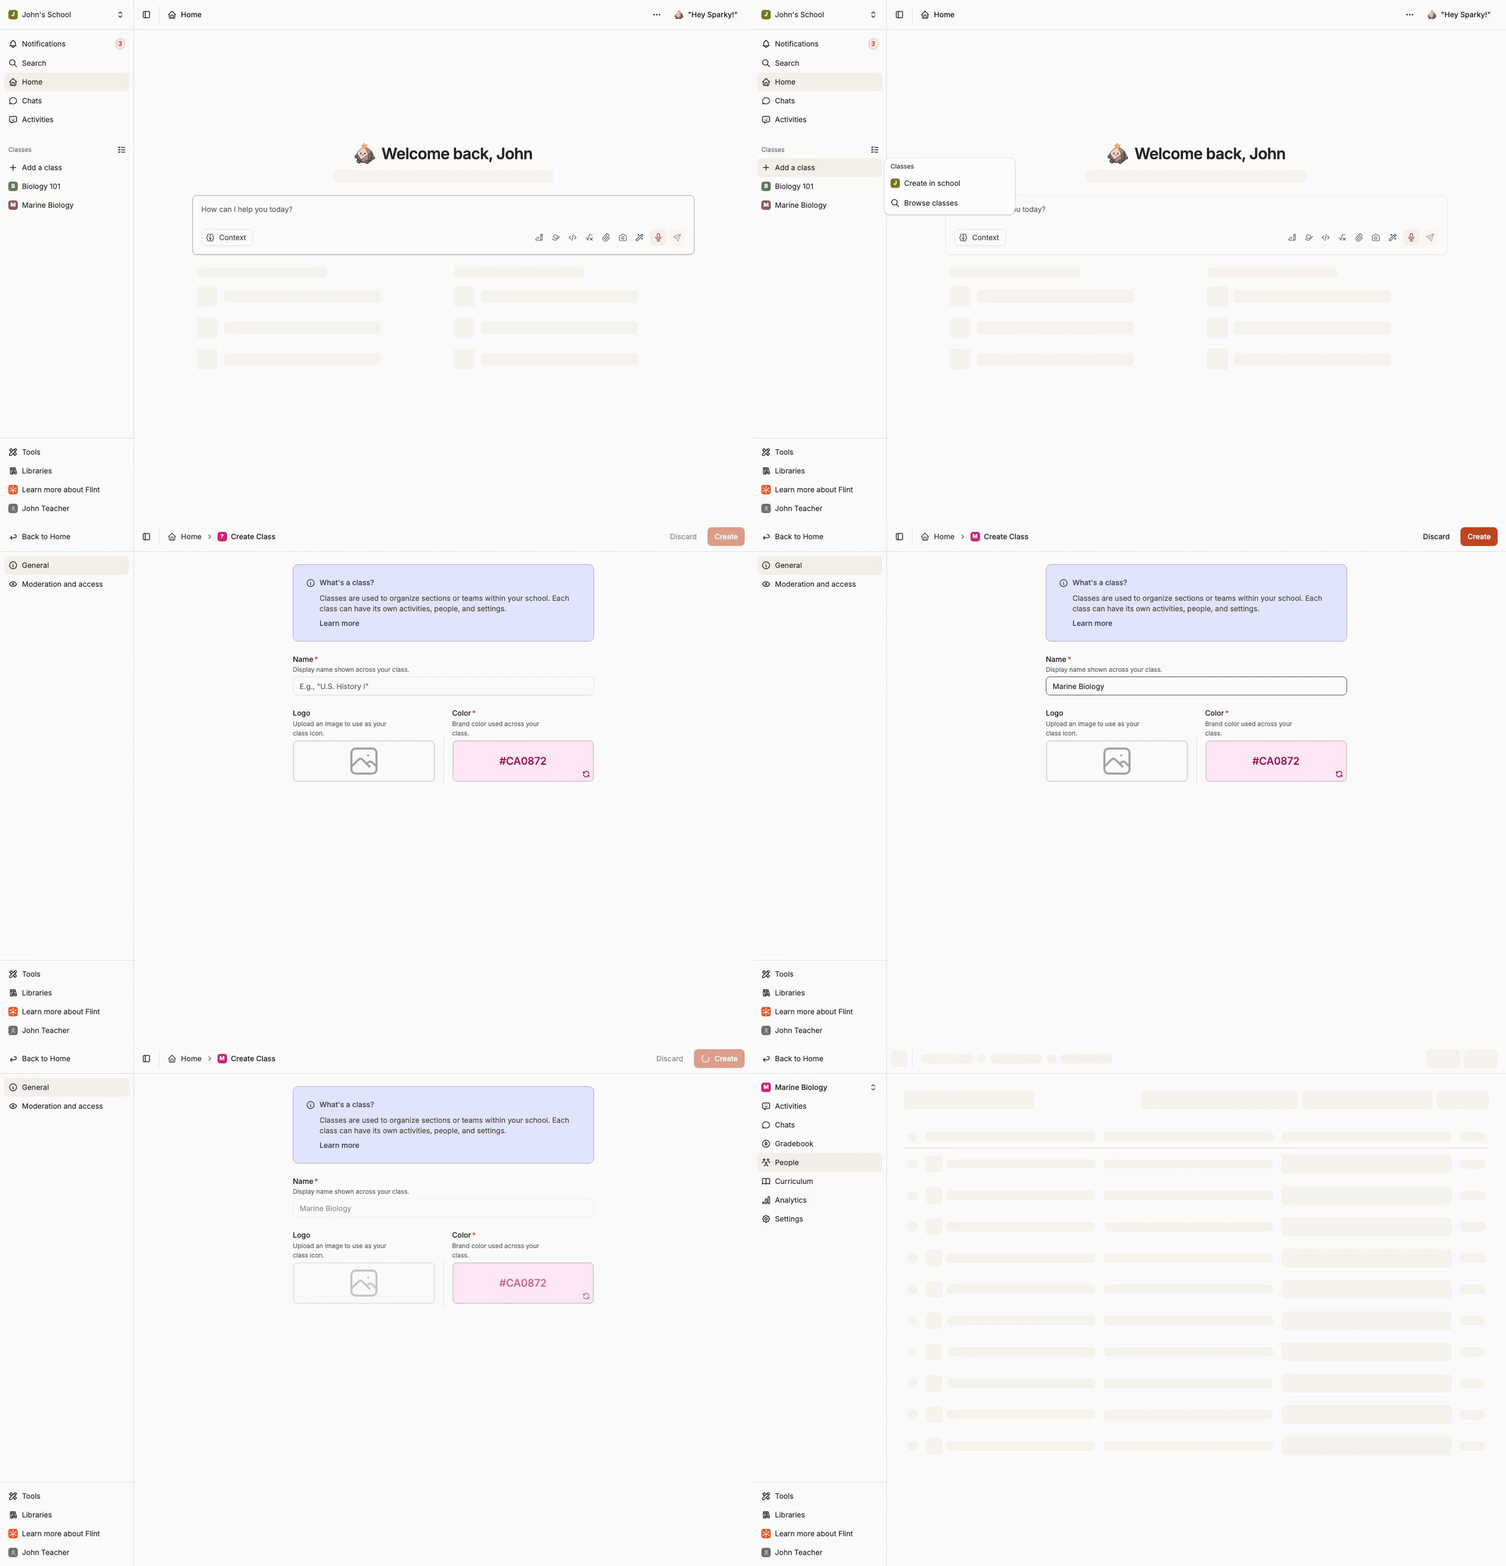
The recording ends while the People page is loading; it does not show a completed roster.
Choose who can access it
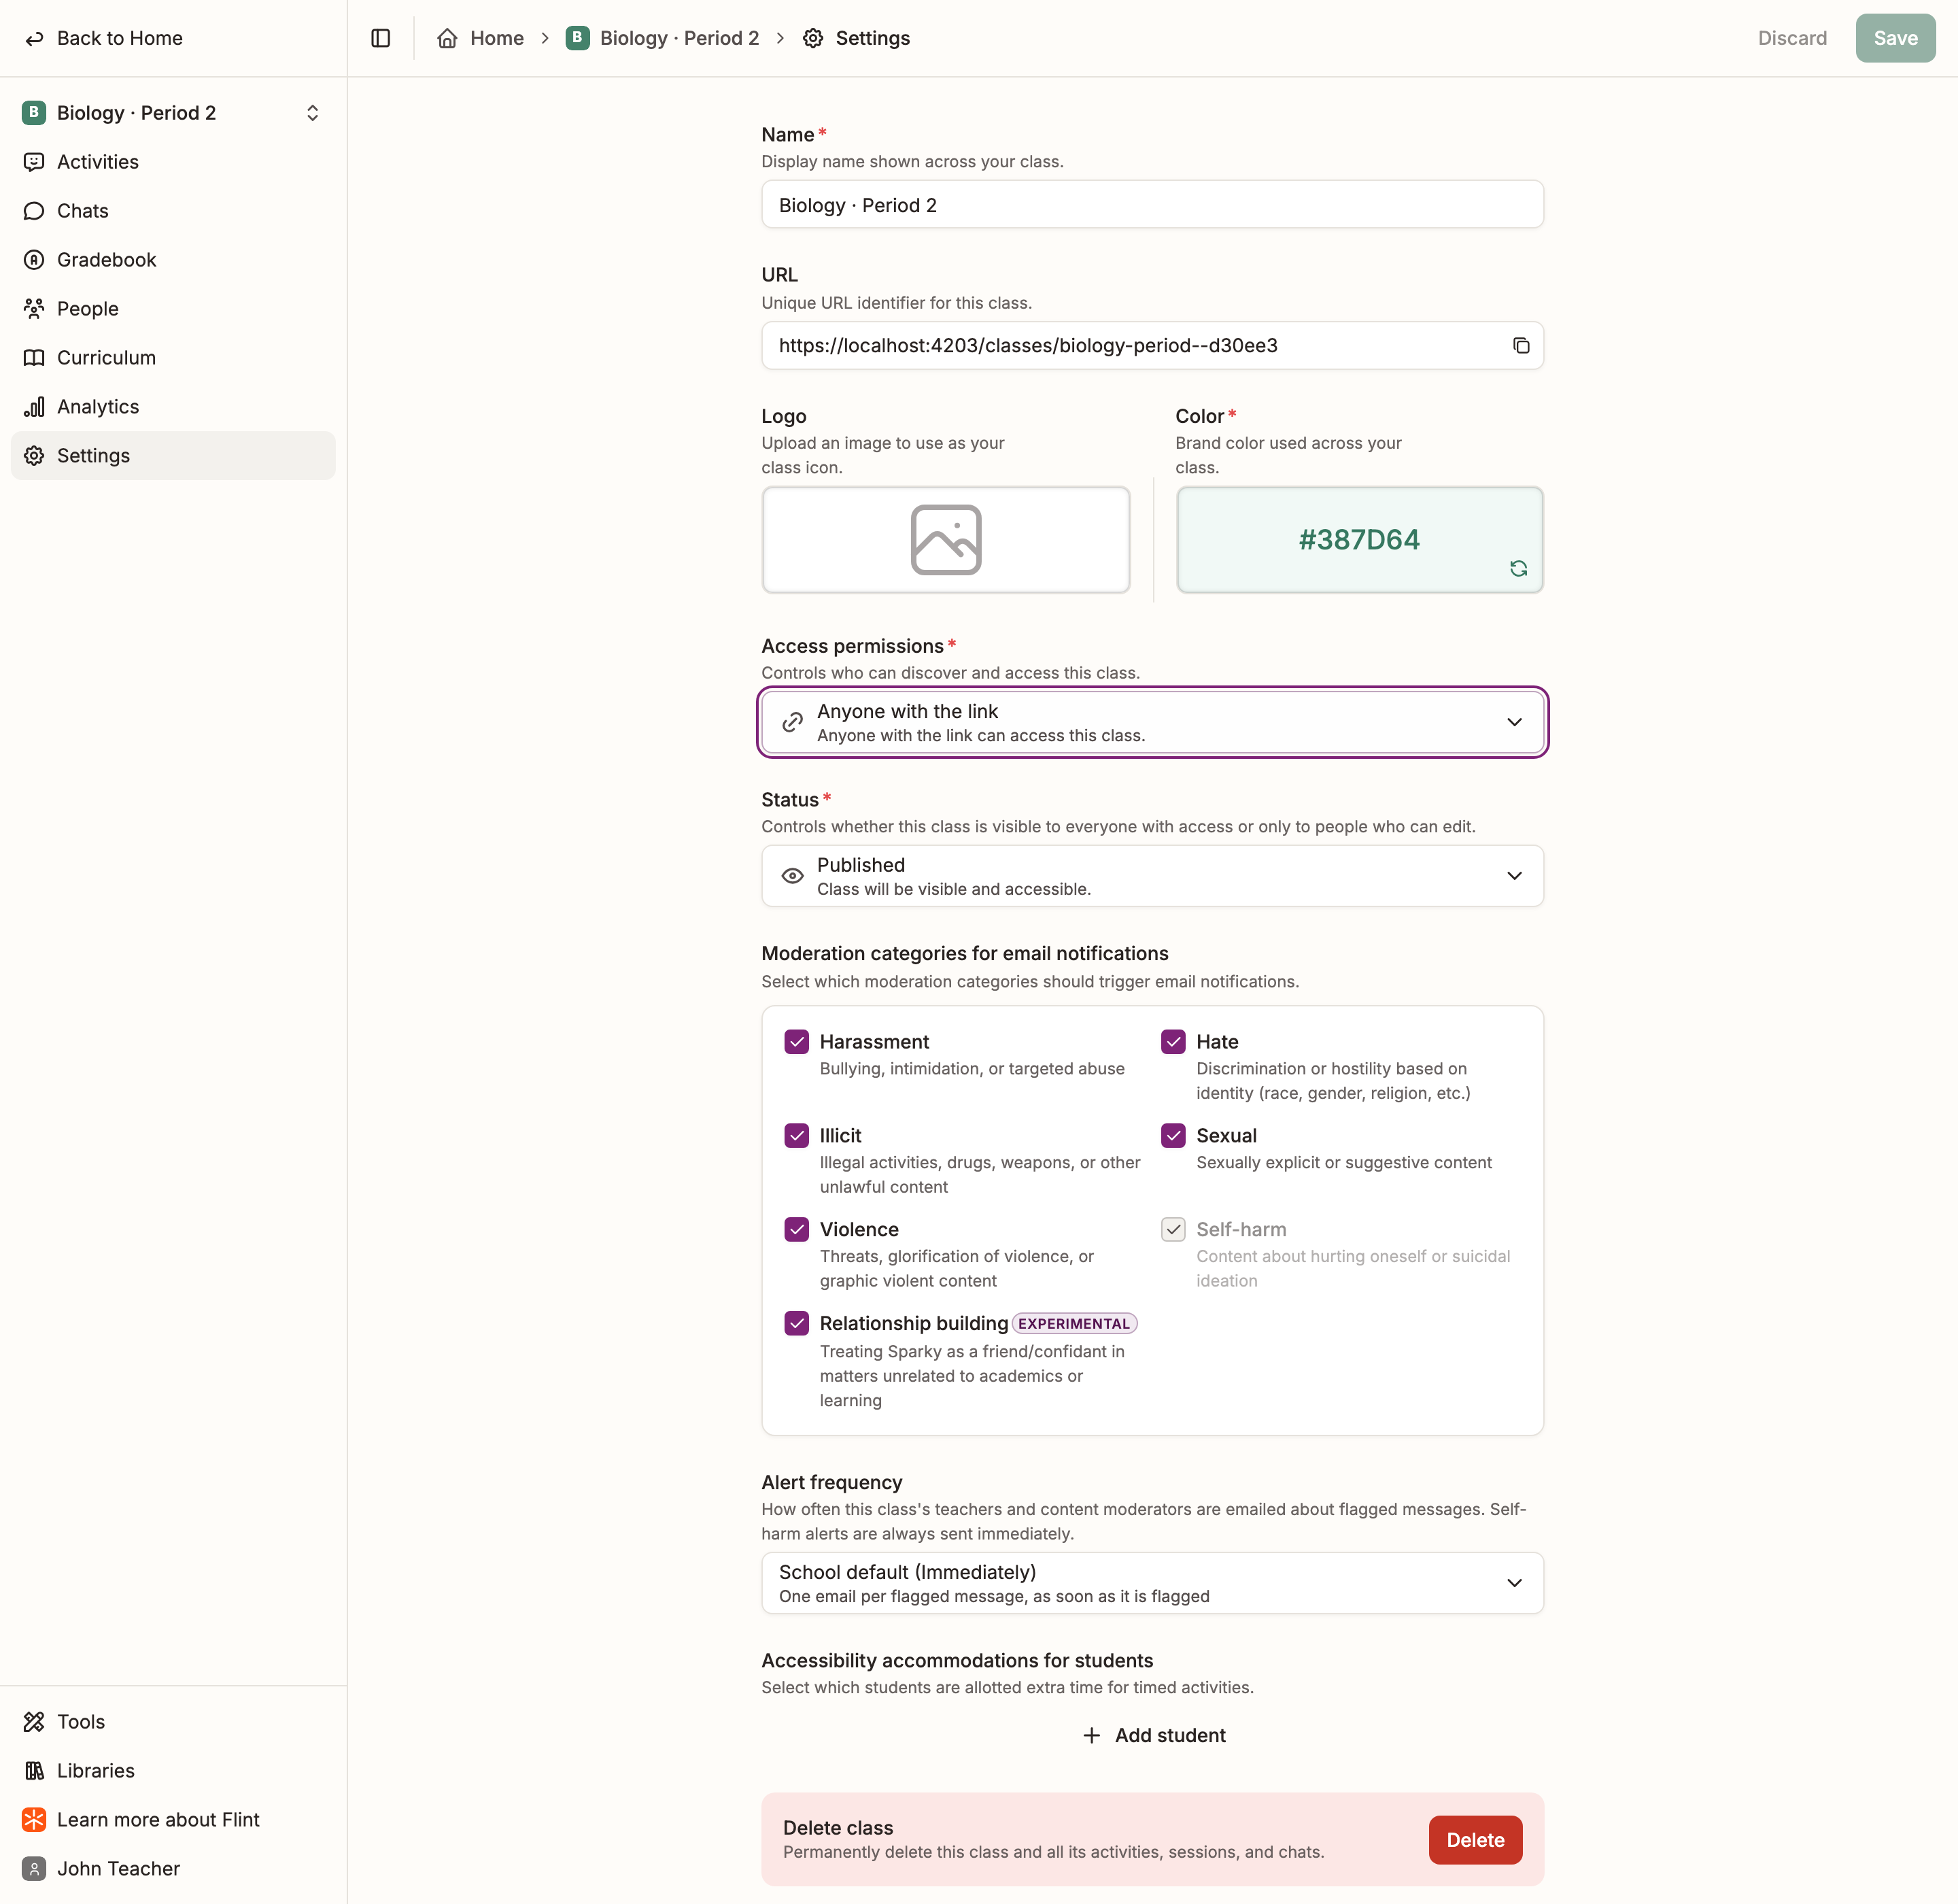
Access permissions controls who can discover and open the class. A new class starts as Anyone with the link. To change it, open the class, click Settings in the class sidebar, and pick one of:
| Option | Who can get in |
|---|---|
| Open to the named school or term, or Public | People in the audience described beneath the option can find the class by searching for it and join it themselves. |
| Anyone with the link | People in the audience described beneath the option can open the sharing link. The class stays out of search for people who are not members or owners. |
| Private | People you add, inherited owners, and eligible term moderators. A sharing link does not grant everyone else access. |
School and term restrictions still apply. Read the audience description beneath each option rather than assuming every sharing link is limited to your school's members.
Then click Save. To send the link, go to the class's Activities page and click Share class at the top.
Set moderation alert frequency
After creating the class, open Settings in its sidebar and find Alert frequency. Leave it on School default, or choose Immediately, Hourly, Daily or Weekly for emails about flagged messages to the class's teachers and content moderators. Self-harm alerts are always sent immediately. Click Save to keep the change — this setting is on the class's Settings page, not the creation form.
Add people and co-teachers
- Click People in the class sidebar, then Add people.
- Paste Email addresses, or click Upload CSV and choose a file with an
emailcolumn. Click Next. - On Review people, everyone starts with Can participate. Change anyone who will help you run the class to Can edit, then click the add button at the bottom of the dialog.
- Click Save at the top of the People page and confirm. Nobody is added until you save.
- If Flint asks whether to email the new people, choose Send emails to notify them, or Not now to leave them added without sending an email.
Can participate lets someone take part in the class's activities. Can edit also lets them create and change activities, see everyone's sessions, and manage the class — so it's the one to give a co-teacher.