
Staff school or term owners add people from Admin → Settings → People. This includes admins and a teacher designated as the term's creator; ownership does not require changing their Teacher role label to Admin. Email and CSV additions belong to the term you are in, so check the term name above People in the sidebar before you start. Email-domain access rules apply to the school, not just the selected term, and require school ownership.
These invitation steps are for staff-led schools, not for inviting others into a student's own free school. Student owners have only General and People settings, not the full set of Admin pages.
You can add people one email address at a time, upload a CSV, or open your school up to everyone with a particular email domain. Whichever you choose, give people a role — admin, teacher, or student — because anyone without one is treated as a student.
Adding your whole school? Import from your SIS or LMS instead. That brings everyone in with their roles and builds your classes from the course rosters.
Add people by email address
- Go to Admin → Settings → People.
- Click Add people.
- Enter the email addresses in Email addresses, separated by commas, spaces, or new lines.
- Click Next.
- On Review people, set a Role — and, if you like, a Grade Level — for each person. While some rows are still unassigned, the button reads Add (N unassigned) as, which gives all of them the same role at once. Otherwise click Add.
- Click Save in the top right, then confirm.
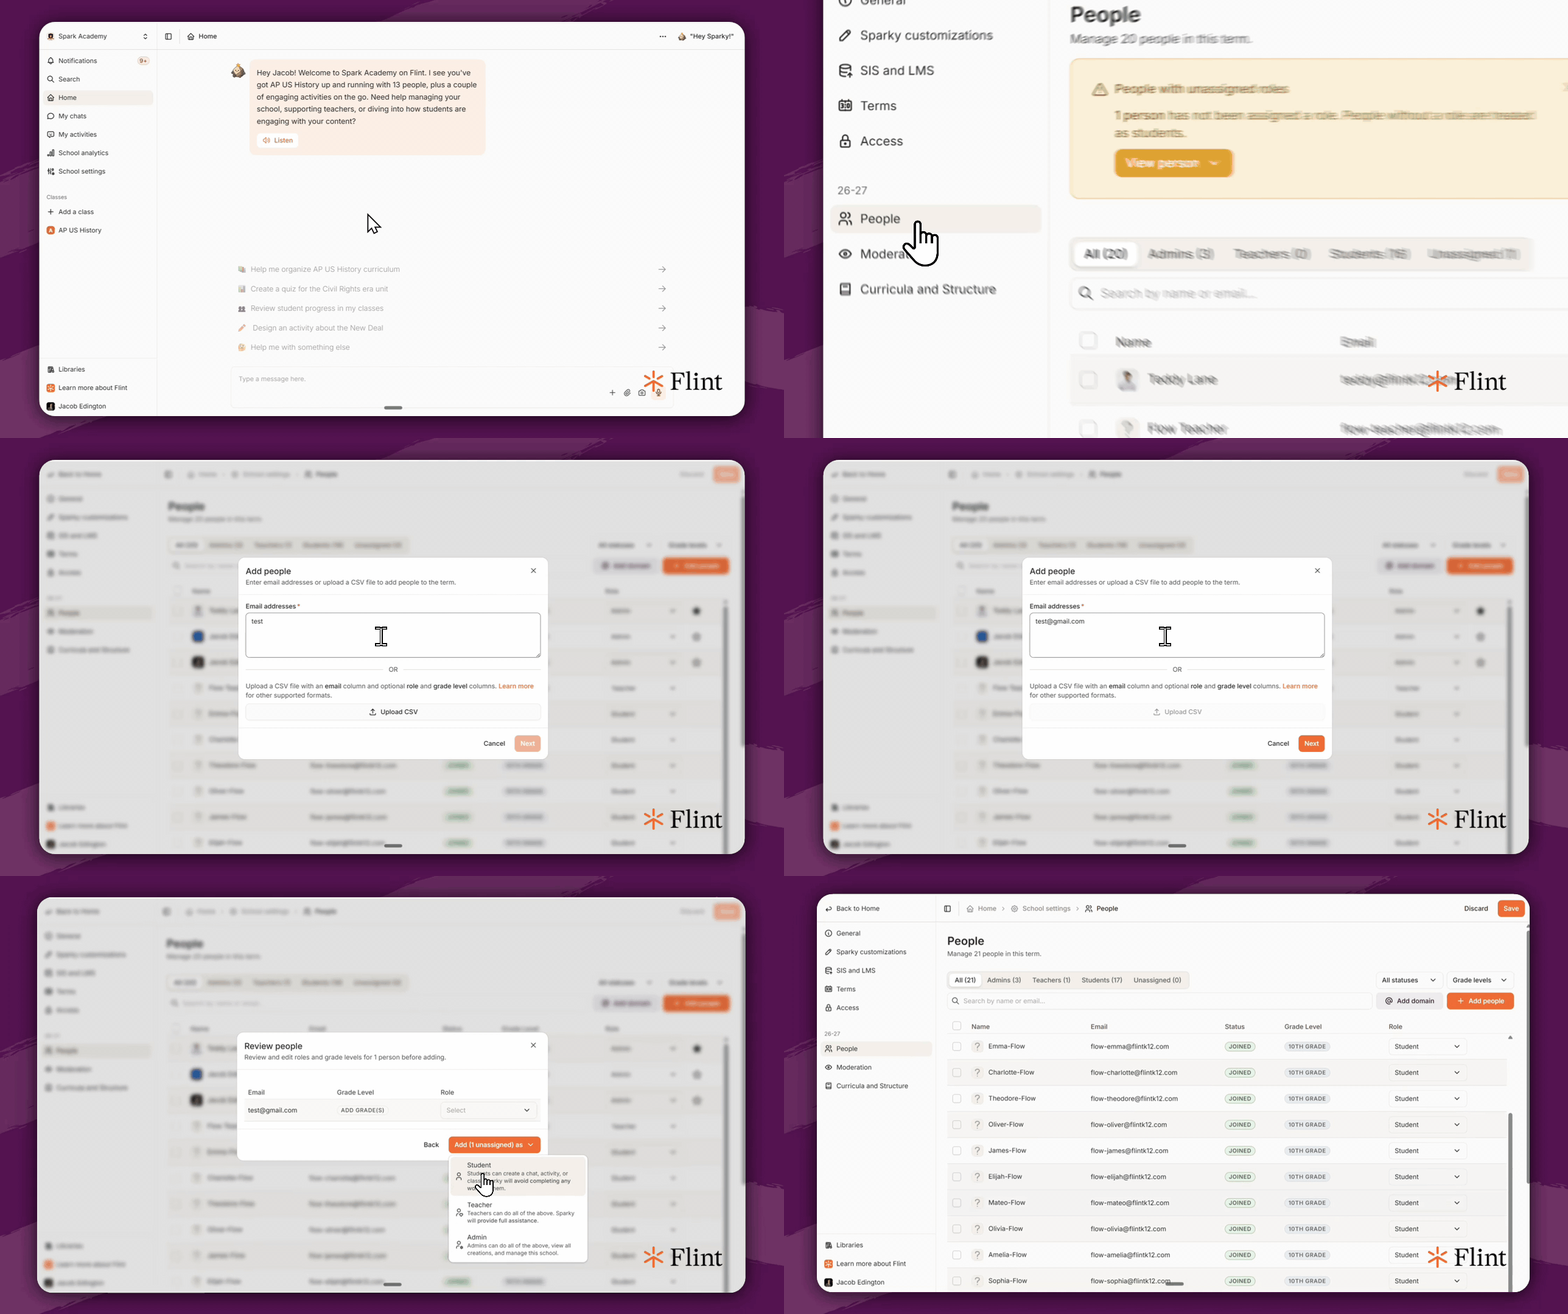
The recordings on this page use older settings navigation. Follow Admin → Settings → People and the current button labels in the written steps.
Flint then asks whether to email the people you just invited. Choose Send emails to send the invitations now, or Not now if you would rather send them later.
Add people from a CSV file
- Go to Admin → Settings → People.
- Click Add people, then Upload CSV.
- Choose your file. It needs an email column; role and grade level columns are optional, and anyone without a role arrives unassigned.
- Click Next.
- On Review people, set any missing roles individually or use Add (N unassigned) as to give the unassigned people the same role. Otherwise click Add.
- Click Save in the top right, then confirm. Choose Send emails to email the invitations now, or Not now to skip the emails; saving adds access separately.
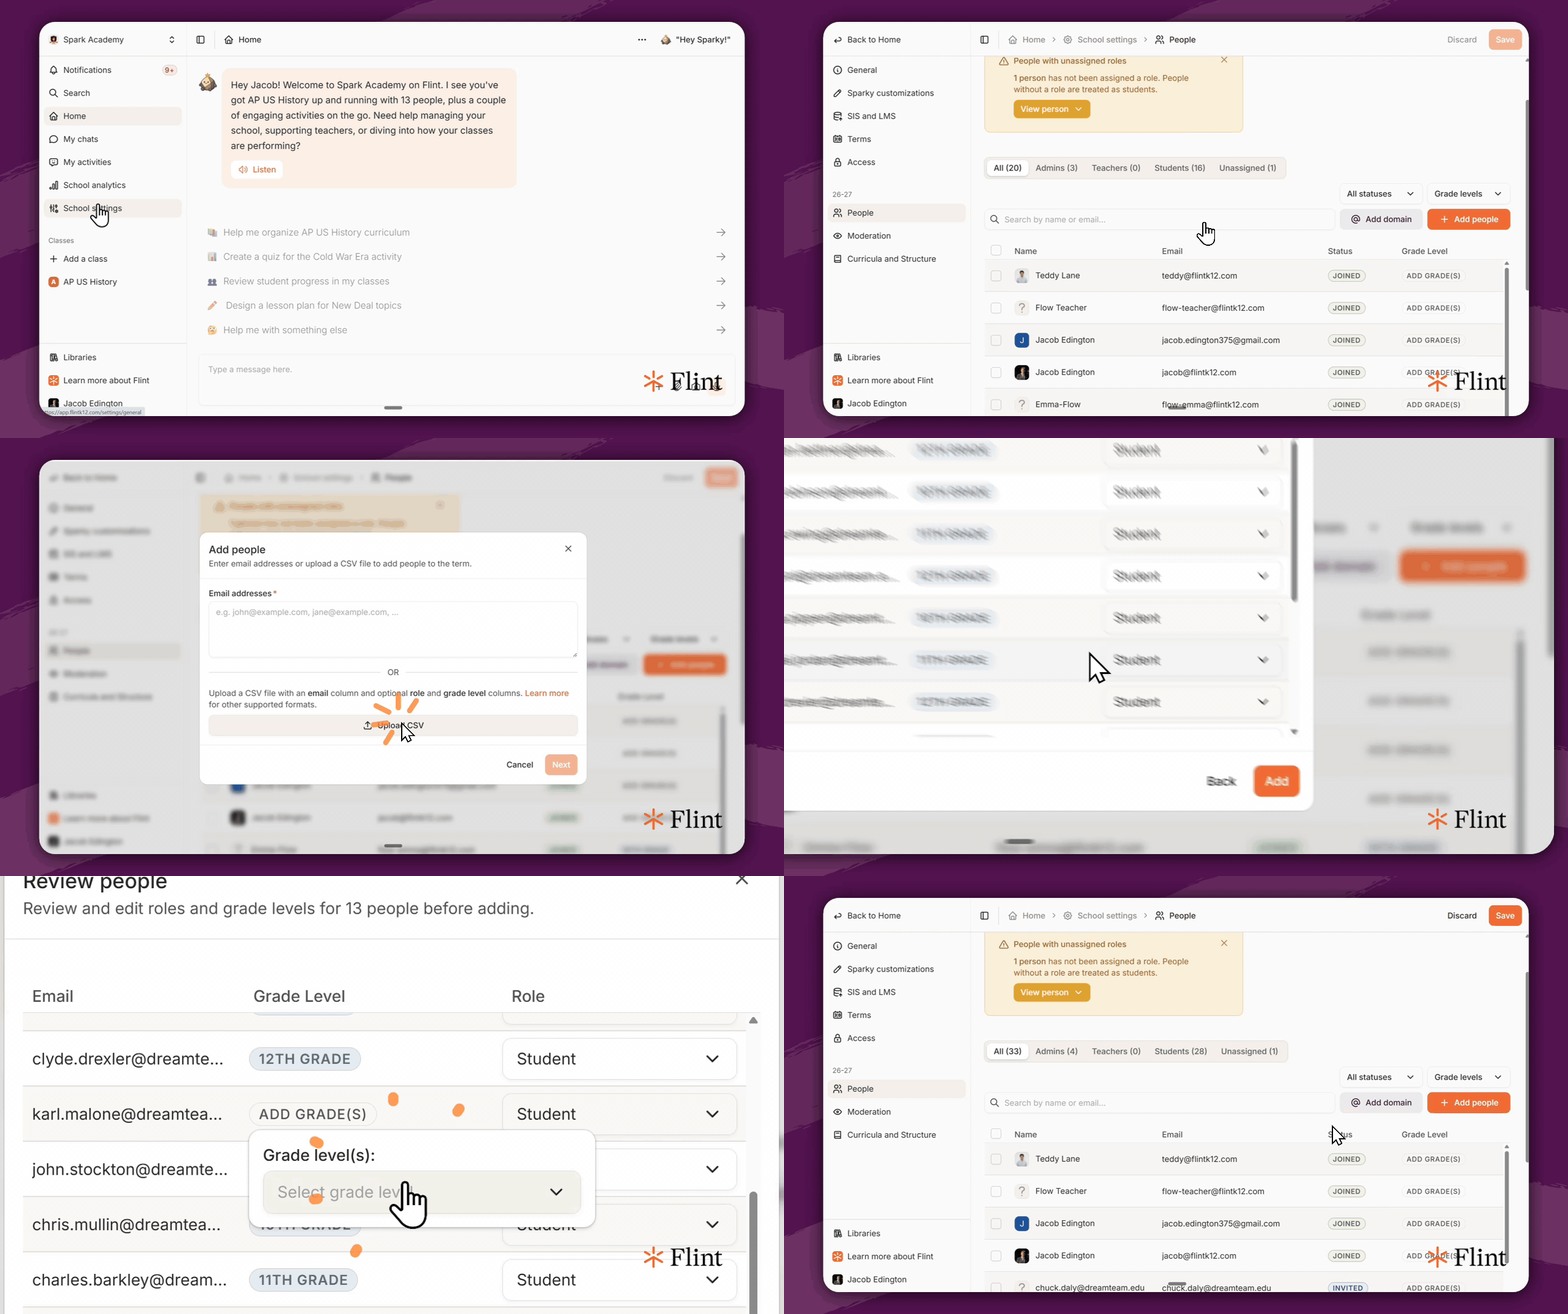
Let everyone with your email domain join
Adding a domain lets anyone with an email address at that domain access the school. The domain's role is the default for people without an explicit roster role. Domain rules apply to the school even when you add them while viewing an inactive or test term — do not use Add domain for test-term-only access.
Use only your school's own email domain. Add domain rejects public email providers such as gmail.com and outlook.com, because opening a school to a public provider would let unrelated people join. You can still invite a specific person's Gmail or Outlook address through Add people; that does not open access to everyone at the provider.
- Go to Admin → Settings → People.
- Click Add domain.
- Enter the domain, for example
yourschool.org. - Pick the default Role for people from that domain. Explicit roster roles take precedence. Choose Unassigned if people will need different roles, then set those individually afterwards.
- Click Add domain, then Save in the top right and confirm.
The domain appears in the people list with its role, so you can change it or remove it later.
Correct a person's name
In paid and trial schools, school owners can select the pencil beside a person's name (Edit name), enter Full name and Preferred name, and select Save name. Both fields are required, and this saves the person's account name immediately, separately from the page's roster Save button. Free schools do not offer this name editor.
Resend an invitation
The Status column reads Invited until someone signs in for the first time, when it becomes Joined.
- While anyone is still invited, the People who haven't joined Flint panel sits at the top of the page. Click Resend N invitations (the button shows the number of people) to open the email confirmation for all of them.
- To choose who gets a reminder, set the status filter to Invited, tick the people you want, and click Resend invitations in the bar that appears.
In Resend invitation emails, review the recipients and click Resend emails to send, or Not now to cancel.
If invitation emails aren't arriving, see how to stop Flint sign-up confirmation emails from getting blocked.