

Six things to do in your first week with Flint. Each one links to the full instructions, and the whole path is written out in Get started with Flint (for teachers).
The captioned walkthroughs follow current controls. The retained overview video in step 2 uses older Workspace and Group labels; follow the written steps for current names.
1. Sign in, and check you're in your school
Go to app.flintk12.com and sign in with your school email address. If you have no school to join, Flint asks your role and what you want to do before creating a personal school. Choosing Build my AI literacy takes you to the course where it is available; another destination you were already opening can take priority.
Look at the top-left corner of the sidebar. If it shows your own name's School rather than your school's name, you are in your personal school. Click that name, and pick your school under Schools. If it isn't listed, ask an admin at your school to add your email address.
Watch: Check your school and term before you build
2. Learn the six words
| Word | What it means |
|---|---|
| School | Your school's space in Flint: its people, classes and content. |
| Term | A semester or quarter. Switching terms in the sidebar shows you that term's work. |
| Class | A class, club or group of people you share activities with. |
| Activity | A lesson with Sparky, a test or quiz, or a file-upload assignment you build for students. |
| Session | One student's conversation in a lesson with Sparky. Tests, quizzes and file uploads have submissions instead. |
| Chat | Your own conversation with Sparky, for your work rather than a student's. |
More on how these fit together: Classes, activities and sessions in Flint. If you built activities in a personal space before joining your school, you can move them across.
3. Set up your classes
If your school syncs rosters from an SIS or LMS, your classes may already be listed under Classes in the sidebar — skip to the next step.
Otherwise, in the sidebar under Classes, click Add a class, then Create in school. Full instructions: How to make a new class.
Watch: Create a class and add reusable context
Classes keep activities, the gradebook and class analytics together. You can add colleagues as moderators.
4. Give the class its context
Open the class, click Curriculum in the class sidebar, and fill in Class context: the grade, the subject, who's in the room, and any ground rules for Sparky. Up to 5,000 characters. Every activity in that class uses it, so you stop retyping the same background.
Example: "10th grade IB World History. Five English language learners who need strong visuals. Always ask students to explain their reasoning before you confirm an answer."
More: Inputting class context.
5. Check the moderation settings
On the class Settings page, choose which moderation categories email teachers and content moderators when a student's message is flagged. Check Alert frequency too: keep School default to inherit the school's schedule, or choose Immediately, Hourly, Daily or Weekly for this class. Self-harm alerts are always sent immediately. Click Save after making changes. See Moderation in Flint.
Watch: Review a class’s existing alert settings
The walkthrough reviews existing categories and frequency, then cancels without changing alert settings.
6. Build and share your first activity
Two ways in, and the second is easier the first time:
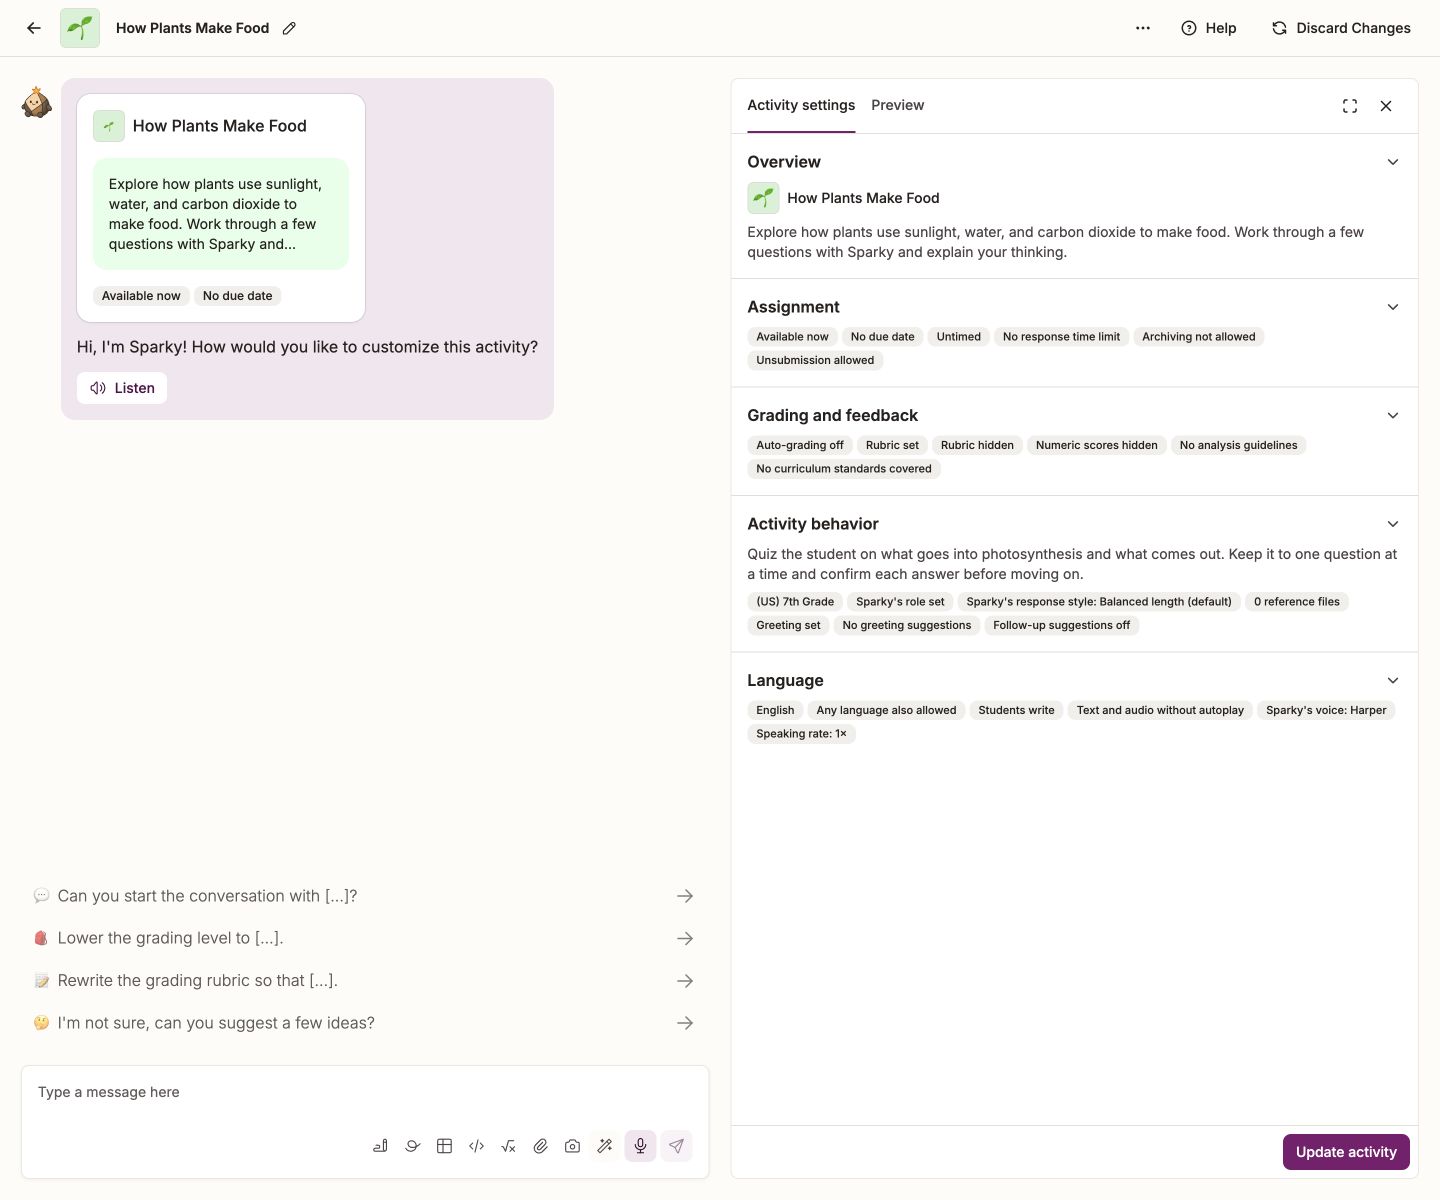
- Start from scratch. Click Create activity, choose Lesson with Sparky, Test or Quiz or File Upload, then click Start building. Describe what you want in the builder conversation. A resumed draft or prepared suggestion can skip the type-selection screen.
- Start from someone else's. Open Libraries › Public library in the sidebar, find something close to what you teach, then open its card's ⋯ menu and select Use activity. Pick the classes or terms the copy goes into and select Duplicate. Open the copy from the list Flint shows and select Edit activity. Tell Sparky what to change, review the copy, then select Update activity or Update assessment. For other copying routes and destinations, see Move or duplicate activities.
Attach your own readings, rubrics or examples to guide Sparky. Click the activity thumbnail to open the draft. For a lesson, select the Preview tab before saving. For a test or quiz, review each question and the assessment preview; for a file upload, check the instructions and rubric. Ask for revisions. For a new activity, click Create activity for a lesson or file upload, or Create assessment for a test or quiz. For a new test or quiz, review the optional Available from and Due date in Review assignment settings, then click Finish creating activity. The share window opens after creation; check access, click Done to save changes, then reopen Share activity to copy the link or display the code. Full walkthrough: Get started with Flint (for teachers).
Tell students what you expect, ask what helped, and revise the activity after seeing their work.
Keep going
- Flint 101 course — self-paced, covers activity creation, analytics and collaboration
- Flint How-Tos on YouTube — short videos on single features
- Help center articles for teachers
- AI Literacy course for teachers — free and self-paced, adapts to what you teach, with a shareable certificate for each of two levels. Where available, open Learn more about Flint and choose AI Literacy for Teachers · Level 1 or AI Literacy for Teachers · Level 2. The in-app course is not available on the UK deployment.
- Subject use cases and the activity idea board
- Campfire Sessions — live sessions with the Flint team
- The Flint teacher Facebook group — swap ideas with other teachers
- The Flint blog — tips and case studies
For advanced techniques, watch Jacob Edington's walkthrough:
Need help?
Click Learn more about Flint at the bottom of the left sidebar, then Help, and ask us. See How to get live help in Flint.